


 A Gardenizi field guide
Air layering, made practical
Root it before you cut it.
A clear guide to turning an attached woody stem into a rooted new plant—without guessing when it is ready to leave the parent.
The big idea
A cutting starts alone. A layer starts connected.
A conventional cutting loses its root system the moment you remove it. Until it makes new roots, every leaf must survive on limited stored water. Air layering reverses that order: you encourage roots on a stem while the stem is still part of the parent plant, then make the separating cut.
That advantage does not make the method automatic. The wound must interrupt the downward flow through the bark without badly damaging the wood. The rooting medium must stay moist without becoming stagnant. And the branch must remain attached long enough to build a useful root system—not merely one exciting white root.
This guide covers the classic wrapped branch, a split pot or bottle collar, and the close-to-soil trunk version often seen on potted woody plants. The container changes; the biology does not.
Air layering is not “cut and hope.” It is “root, verify, then cut.”
Choose a healthy parent and a manageable woody stem.
Interrupt the bark cleanly while leaving the wood intact.
Hold damp, airy medium firmly around the wound.
Protect the bundle and correct moisture before it fails.
Wait for a distributed root network, not a date on a calendar.
Cut, pot, shelter, and let the new roots take over gradually.
Choose the right version
Three ways to keep a wounded stem connected.
Use the least awkward method that keeps the wound stable, moist, aerated, and easy to inspect. A clever container is useful only if it serves those four conditions.
Wrapped air layer
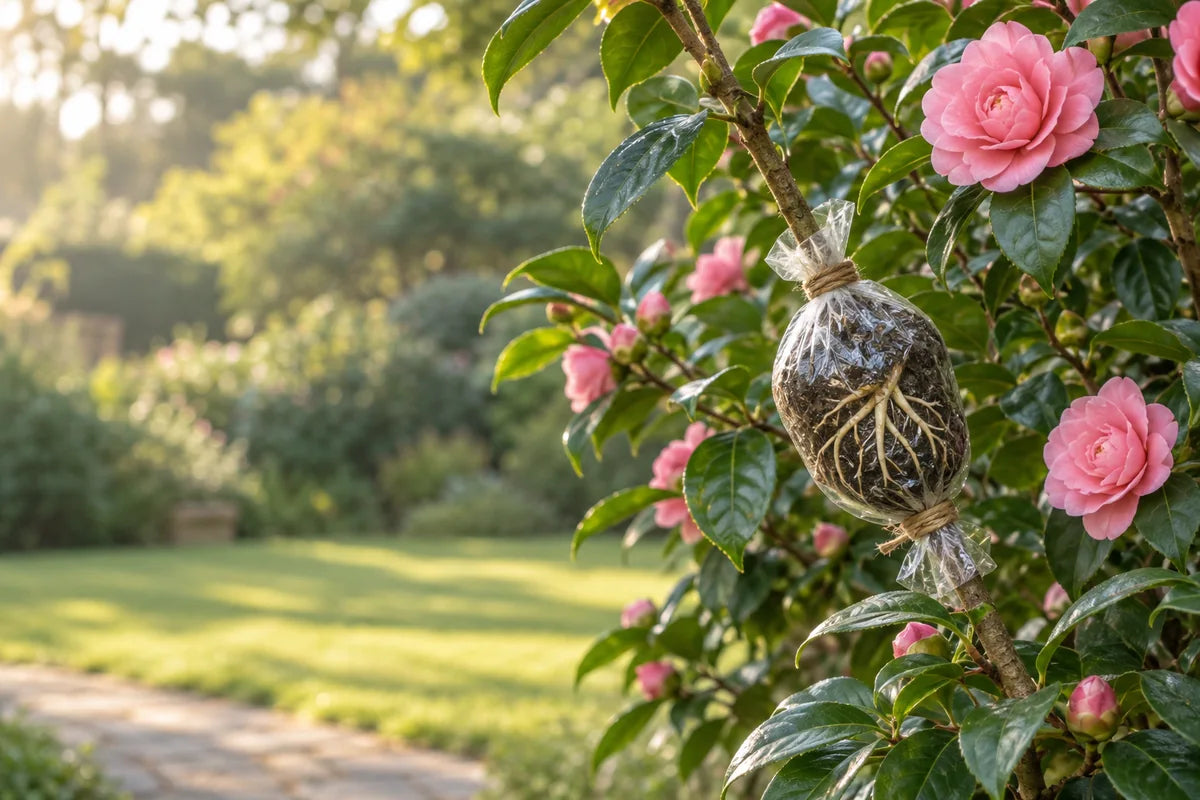
A compact pad of damp medium is wrapped around a wound on a branch above the ground. Clear plastic makes roots easier to see; a removable outer cover can limit heat and light when needed.
Best whenThe branch cannot be bent to soil and can support a light, sealed bundle.
Split pot or bottle collar
A cut container closes around the stem and holds a larger volume of medium. It can sit on a branch or surround the lower trunk of a container-grown plant.
Best whenYou can stabilize the collar and provide drainage without letting the medium dry too quickly.
Simple ground layer
A flexible low stem is wounded, bent into garden soil or a nearby pot, pinned down, and left attached until it roots.
Best whenThe plant already has a low, bendable branch; no suspended bundle is needed.
Before the knife
Choose a branch that can finish the job.
Start with a healthy, correctly identified parent plant. Avoid stems on a plant that is wilted, recently repotted, heavily infested, or already struggling with root problems. Layering asks the parent to support the chosen shoot while also responding to a wound.
Timing is species- and climate-dependent. Active growth is often the useful window, but “spring” is not a universal instruction. Learn the normal propagation season for your plant where you grow it.
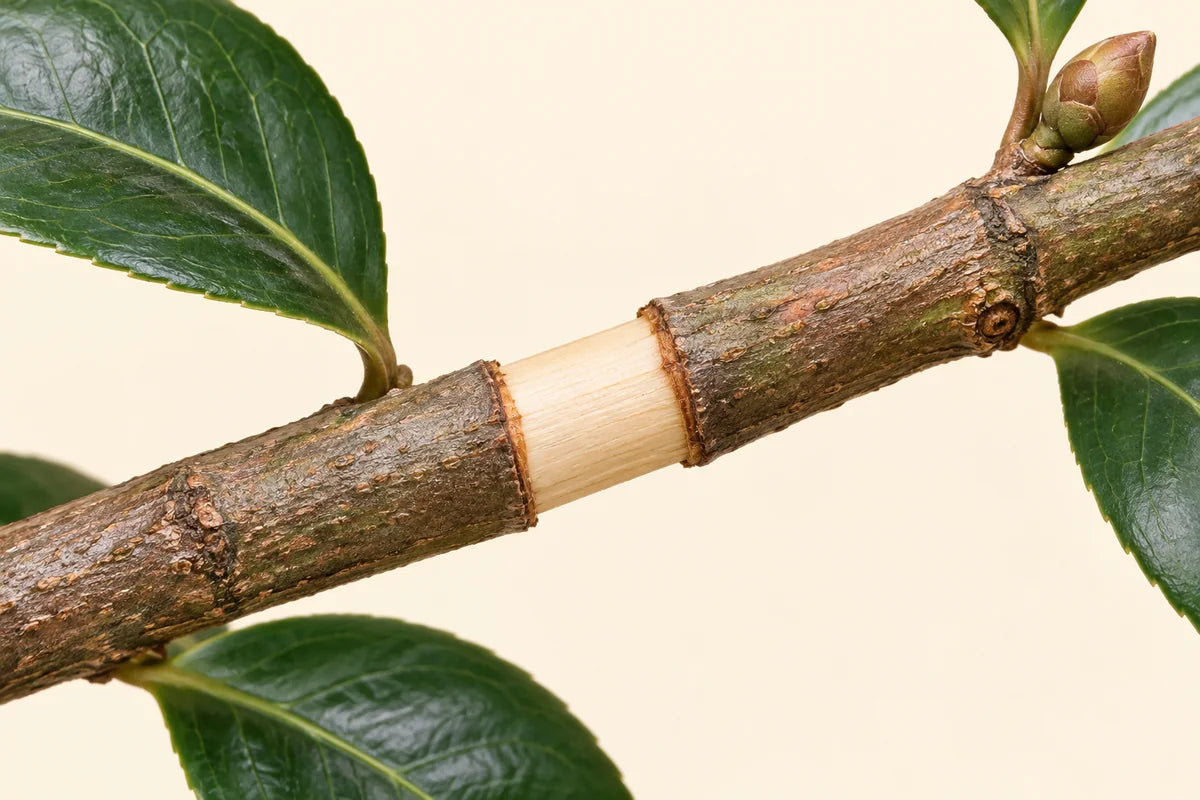
Illustrative wound anatomy. A clean ring exposes pale wood but does not gouge deeply into it.
Make the wound make sense
Interrupt the bark—not the branch.
On many woody broadleaf plants, the usual air-layer wound is a complete ring of bark. Two shallow circular cuts define the band; a lengthwise cut connects them; the bark is lifted away. The exposed surface is then gently scraped to remove the slippery cambium layer that could otherwise reconnect across the wound.
The purpose is to slow the downward movement of sugars and growth signals through the bark while water can still move upward through the wood. Deep cuts weaken that water pathway and the structure supporting the branch.
Some plants and propagation systems use a slanting wound held open instead of a full ring. That is an alternative technique, not an invitation to improvise several wounds on the same stem. Match the wound style to the plant.
Clean first
Use a sharp blade and clean it before the cut. Keep fingers out of the cutting path.
Size the ring
Remove a modest band appropriate to the stem—wide enough not to bridge immediately, never a long bare section.
Lift the bark
Work around the circumference so no bark strip remains connecting the upper and lower edges.
Scrape lightly
Remove the slick cambium residue without carving a groove into the pale wood beneath.
Enclose promptly
Bring prepared damp medium into contact with the wound before the surface dries excessively.
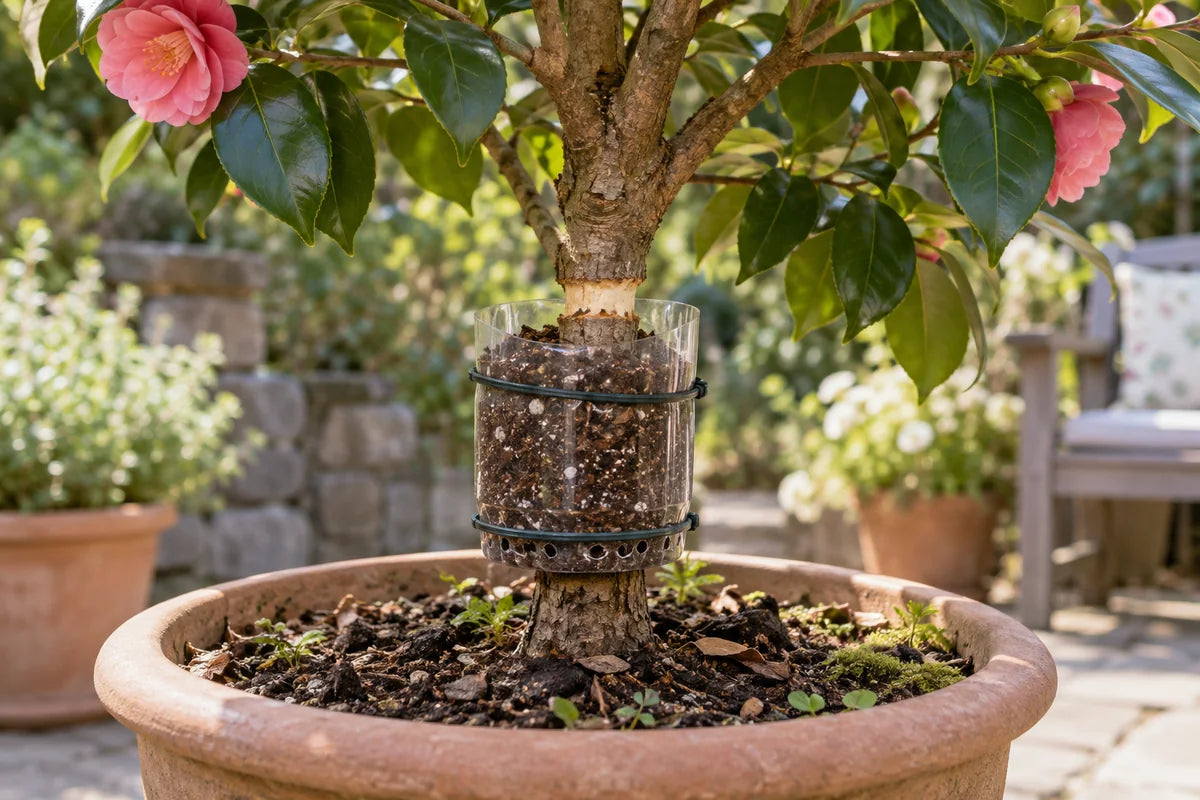
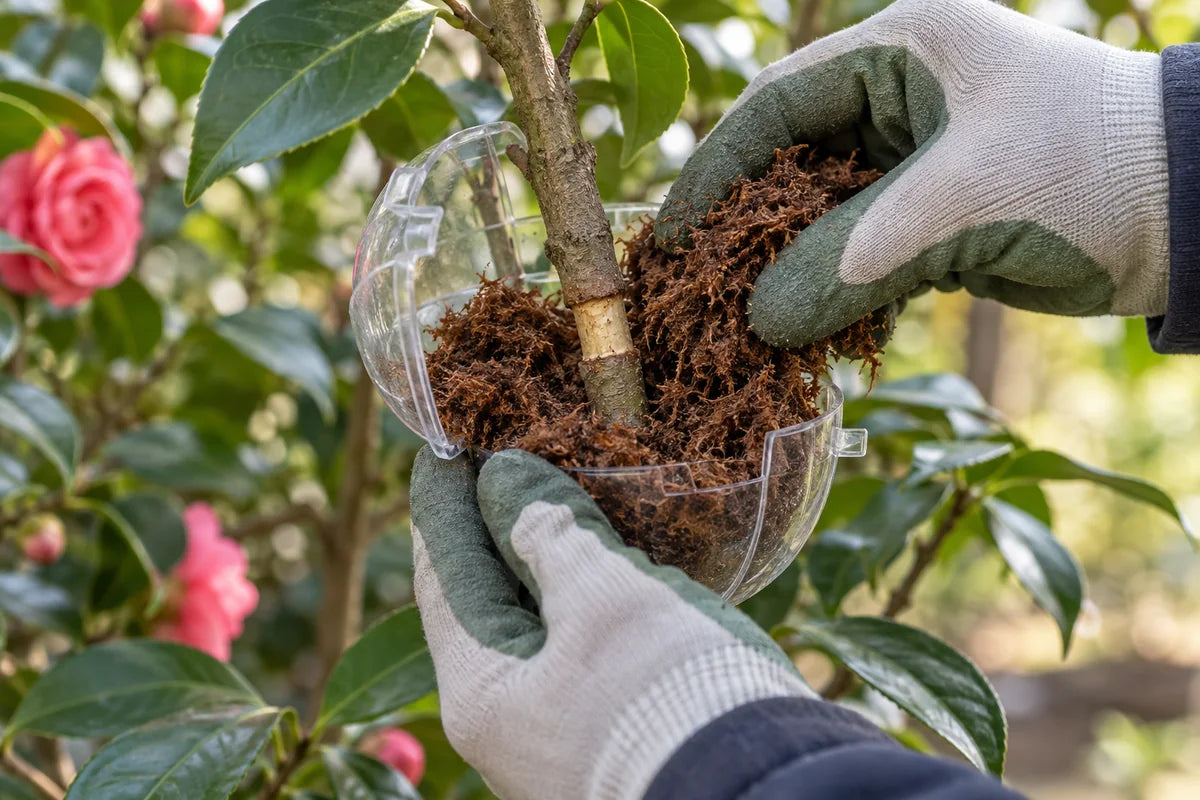
Illustrative close-to-soil collar method. The collar is stable, accessible, and able to drain; it is not a sealed cup of water.
The lower-trunk variation
A bottle collar is a container—not the rooting trick.
For a potted woody plant, a ring wound can be made low on the trunk and enclosed by a cut bottle or split pot. Filled with suitable medium, the collar becomes a temporary rooting chamber above the plant’s original root ball.
This version can hold more medium than a plastic-wrapped handful and can be convenient to water. But more volume also means more weight, more leverage on the stem, and a greater risk of stagnant water if the base does not drain.
- Fit the collar without pinching or sawing against the trunk.
- Support it independently if its weight could bend the plant.
- Keep the wound inside the medium, not exposed above it.
- Add small drainage openings where water could otherwise pool.
- Do not assume that touching the original potting mix makes it a ground layer; the new roots still must form above the ring.
Skip this setup when the trunk is too thick to wound safely, the container cannot be stabilized, or removing the new plant later would leave the parent with no viable structure.
Build the rooting chamber
Moisture and oxygen must arrive together.
The medium is not there to “feed” the wound. It keeps the wound moist, admits air, and gives new roots a protected space to enter. Whatever you use should be clean, easy to rewet, and loose enough to avoid becoming an airless plug.
Optional medium component
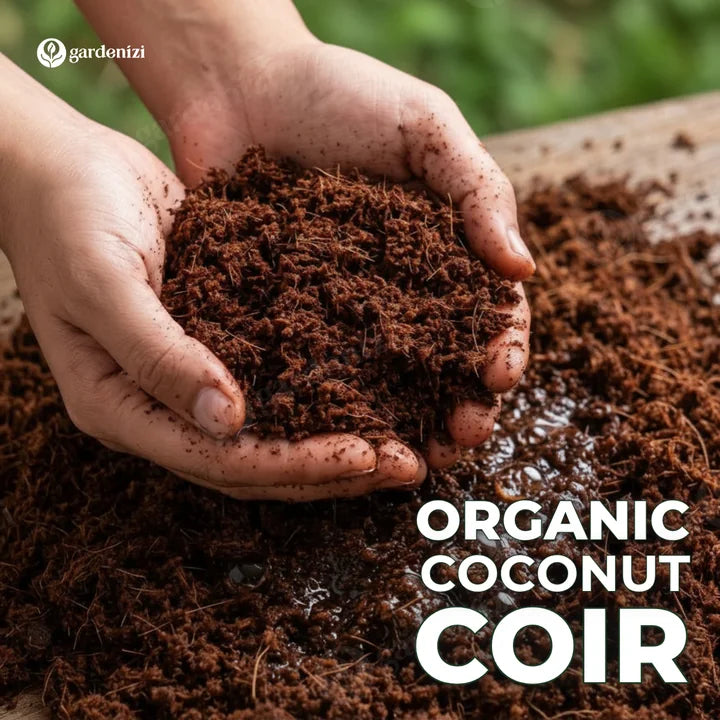
Use coconut coir for moisture-holding structure.
Hydrated, fluffed coir can help form a contained medium around the wound or contribute to a loose collar mix. It holds moisture without needing to be packed hard.
- Use it when: you have a well-contained bundle or collar and need a clean, moisture-retentive fibrous component.
- How: hydrate fully, squeeze out free water, fluff the fibers, and place them in gentle contact around the wound.
- Its role: moisture management and physical support—not fertilizer and not a rooting guarantee.
- Do not use it: bone-dry, dripping wet, tightly compressed, or loose on an uncontained branch where it can fall away.
The waiting phase
Monitor the bundle, not the calendar.
Rooting may take weeks or months depending on the plant, temperature, season, wound, and medium. A date can remind you to inspect; it cannot declare the layer ready.
Damp, not dripping
Condensation alone is not proof. Check whether the medium itself remains evenly damp. Add water carefully rather than flooding the collar.
Protect from heat
Clear plastic in hard sun can overheat. Shade the bundle or add a removable opaque outer layer without making inspection impossible.
No empty pocket
Shrunken medium may pull away from the upper wound edge. Restore gentle contact without crushing new tissue.
Watch the whole shoot
Persistent wilting, dieback, rot, or a loosened branch is a problem signal—not a reason to add fertilizer to the bundle.
Rooting hormone is optional and species-specific. More is not better. If you use one, follow its label and keep it on the intended wound surface rather than dusting the entire bundle.
The readiness test
One root is news. A network is support.
Callus tells you the plant has responded to the wound. A few short roots tell you rooting has begun. Neither necessarily means the layer can supply a leafy top after it is cut free.
Look for multiple healthy roots distributed through more than one side of the medium. The root mass should be developed enough that the medium can remain together when the enclosure is removed. The branch above it should still look healthy.
Do not wait for a decorative white ball. Roots can become crowded, hot, or damaged in a tiny enclosure. “Enough to establish” is the goal; exact density varies with plant size and species.
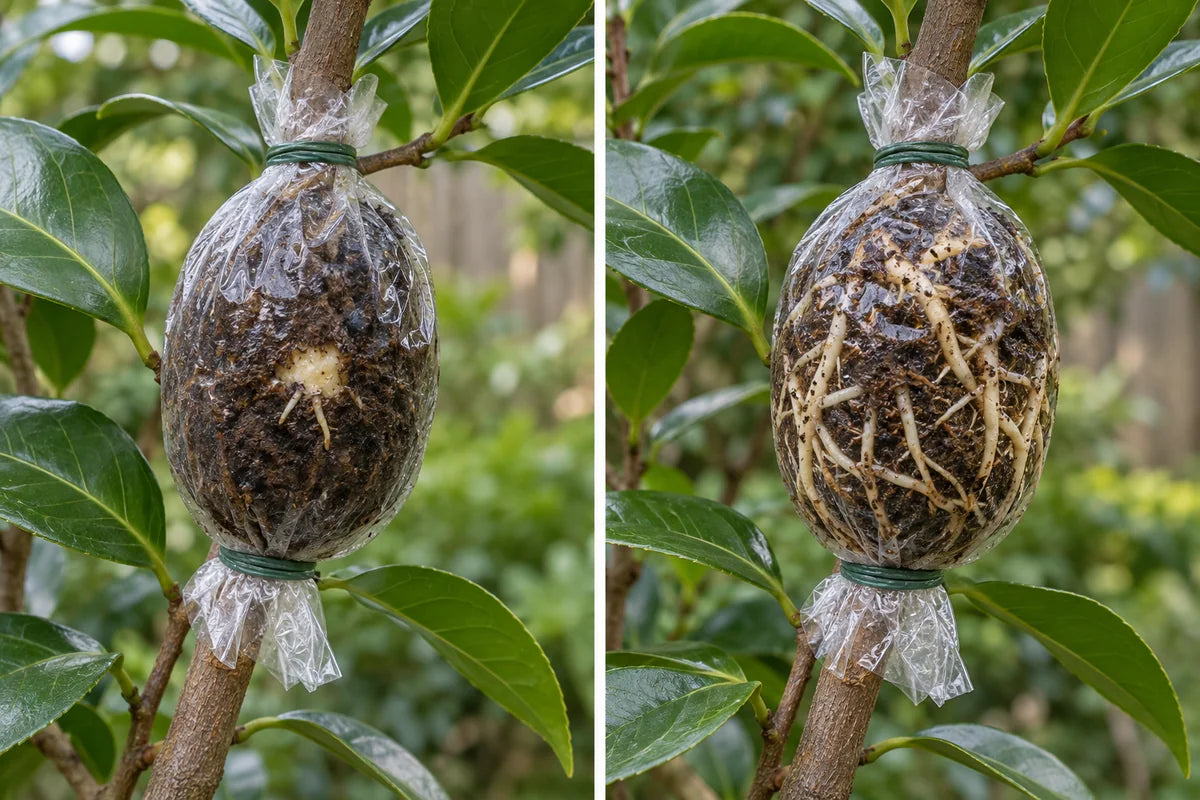
Illustrative comparison. Left: rooting has started but support is sparse. Right: roots are distributed through the medium.
Separation day
Prepare the landing before you make the cut.
Stage the pot
Have a small container, suitable potting mix, ties, labels, and a sheltered aftercare space ready.
Support the top
Hold the future plant so its weight cannot tear the root ball or peel bark as the cut finishes.
Cut below roots
Use a clean tool just below the rooted zone. Preserve the new roots and avoid leaving an awkward length of bare stem.
Pot without teasing
Remove the enclosure gently, keep the root ball together, stabilize the stem, and water the mix into contact.
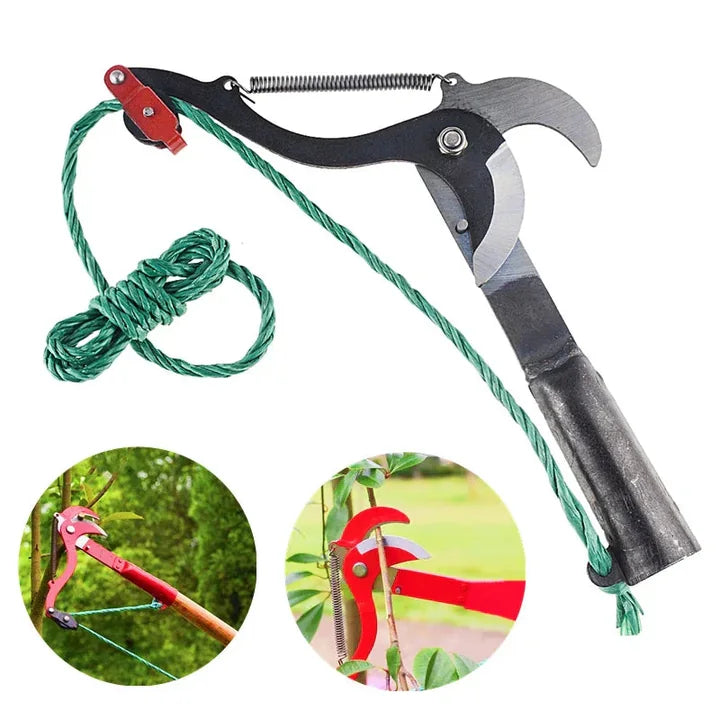
For a rooted layer above easy reach
Bring the cutting head to the branch.
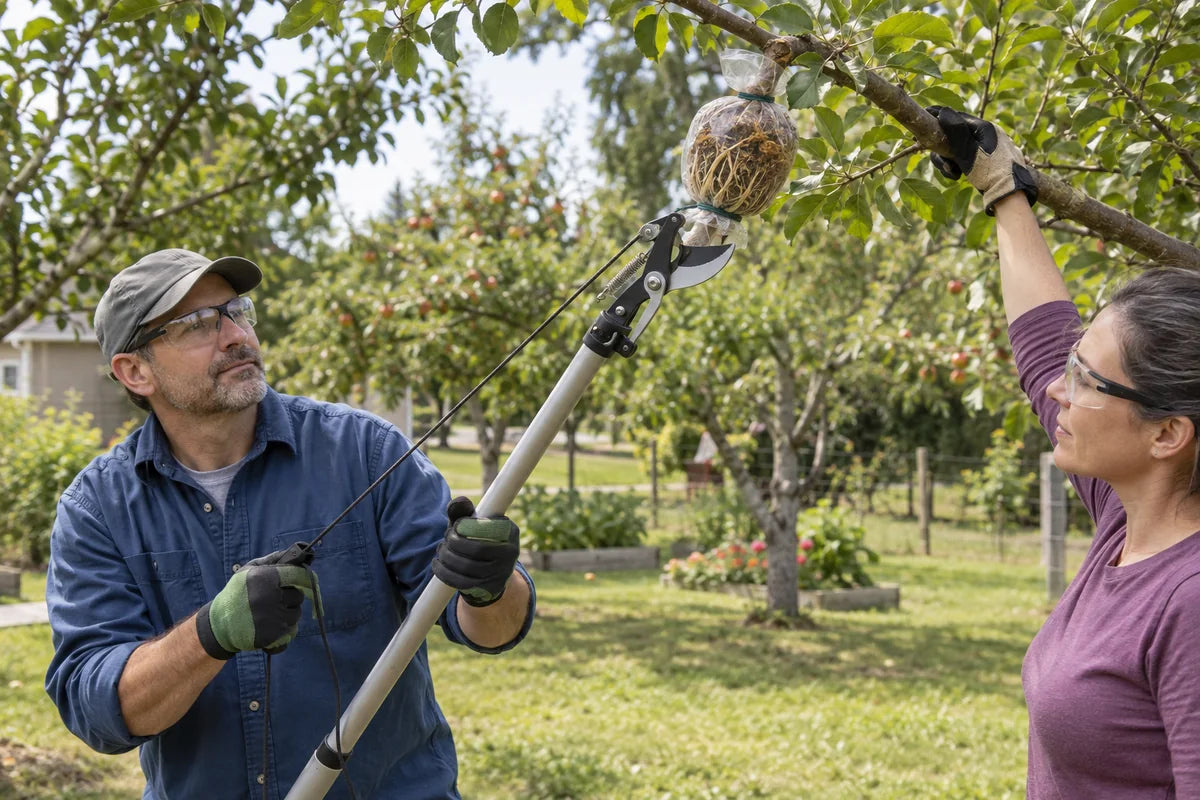
This rope-operated lopper head mounts to a compatible pole, letting the operator cut a modest branch from stable ground after the root system is ready.
- Use it when: the rooted layer is above comfortable hand-pruner reach, the branch fits the tool’s capacity, and another person can safely support the light top.
- How: clear the drop zone, wear eye protection, position the jaws just below the root ball, support the branch, then make one controlled cut.
- Its role: safer reach and a controlled separating cut without climbing a ladder.
- Do not use it: near power lines, on thick or heavy limbs, without a compatible secure pole, under a falling branch, or before the layer has enough roots.
The first weeks alone
Treat the new plant as rooted—not established.
The severed layer has roots, but it does not yet have the reach or reserve of the parent’s root system. Pot it at the same level the roots formed, with the root ball covered but the stem not buried deeply. Use a mix that suits the species and drains while staying evenly moist.
Keep the plant protected from harsh midday sun, drying wind, and temperature extremes while the roots extend into the new mix. Bright shade or filtered light is often a useful transition, adjusted for the species. Stake the stem if movement would rock the new roots.
Do not compensate for transplant stress with a strong feed. Wait for the plant to stabilize and show new growth before returning gradually to an appropriate feeding routine. Also avoid constantly unpotting it to “check” the roots; new resistance, firm foliage, and fresh growth are safer signals.
The parent kept the branch alive while roots formed. After cutting, your job is to make the transition gentle.
When the layer stalls
Read the failure before repeating the method.
Callus, but no roots
The plant has responded, but the wound may have bridged, the species or season may be unsuitable, or conditions may not favor rooting.
Check next
Inspect for bark reconnecting across the ring and review species-specific timing. Do not keep widening the wound repeatedly.
Medium keeps drying
The enclosure may leak, be too small, receive too much sun, or contain material that was never evenly hydrated.
Check next
Repair the seal, shade the bundle, and rehydrate carefully. If it repeatedly collapses, rebuild only if the stem is still healthy.
Medium smells sour or roots darken
Standing water and compressed medium can create an airless chamber. New roots may rot before they can support the branch.
Check next
Improve drainage and air space. Remove decayed material only if you can do so without destroying healthy roots.
Only one side roots
Moisture or medium contact may be uneven, or the wound may not be complete around the stem.
Check next
Wait if the branch is healthy, stabilize the bundle, and restore even contact rather than cutting early.
The shoot wilts above the wound
The cut may be too deep, the branch may be cracked, or the leaf load and weather may be overwhelming the water supply.
Check next
Protect the shoot from heat and wind, assess structural damage, and accept that a badly severed water pathway may not recover.
The new plant collapses after cutting
Roots may have been too sparse, the root ball may have broken, or the move into sun and wind may have been too abrupt.
Check next
Shelter the plant, stabilize it, keep the mix evenly moist, and resist strong fertilizer. Prevention begins with the readiness test.
Quick answers
Air-layering questions worth settling first.
Can every woody plant be air layered?
No. Many woody ornamentals and some fruit plants respond well, while others root slowly or unreliably. Start with species-specific guidance rather than assuming “woody” means suitable.
Is sand enough in a bottle collar?
A clean, coarse, well-aerated medium can work in some methods, but fine sand can compact and stay airless. Judge particle size, drainage, stability, climate, and the plant—not the label “sand” alone.
Should the plastic be clear or dark?
Clear material makes inspection easier. If heat or light becomes a concern, add an opaque removable cover and lift it during checks. Do not unwrap the root zone repeatedly.
How often should I water the bundle?
There is no fixed schedule. A sealed wrap may need little intervention; an open collar may need more. Water when the medium begins to lose even moisture, before it becomes dry or waterlogged.
Can I fertilize inside the air layer?
The initial goal is root initiation in a stable, airy, moist environment. Concentrated fertilizer can add salt stress to new tissue. Feed the parent appropriately; do not turn the bundle into a strong fertilizer pocket.
Can I propagate a named cultivar?
Biology and permission are separate questions. Some cultivars are protected by plant patents or other rights that restrict asexual propagation. Check the plant label and applicable rules before reproducing it.
When is the best time to make the cut?
When enough healthy roots are distributed through the medium and aftercare conditions are mild enough to protect the new plant. That evidence matters more than a preset number of days.
Why not simply take a cutting?
Cuttings are faster and more space-efficient for many plants. Layering is especially useful when cuttings are difficult, when you want a larger starting plant, or when keeping the shoot attached improves the odds.

A little seasonal joy
Christmas is coming—let the garden join in.
Once the propagation work is tucked in and protected, add a cheerful winter focal point with the Twinkling Solar Snowman Flag. Place it where its solar panel can receive useful daylight and where it will not block paths, sprinklers, or access to your air layers.
Decorate with the Solar Snowman FlagThe rule to remember
Make roots while the parent is still carrying the risk.
Choose a workable stem, make a clean wound, contain a damp and airy medium, and let the roots—not your impatience—decide when the new plant is ready.
Maya Collins · Gardenizi